
Measure your waist
Measure your waist with your corset (if you wear one) and your proper undergarments on. Don't pull the measuring tape super tight or let it sag loosely.
Divide your measurements by 4. You'll find out why shortly.
As an example, the skirt I am pleating in these pictures needs to fit a 30" waist.
30 divided by 4 is 7.5.
A 5 yard length of fabric
You will need a length of fabric 5 yards long. To figure out out how tall it should be, measure from your waist to your ankle and add 3-5 inches for hem and waistband allowance.
If your fabric is one color or has a longways design with the bolt, you can cut panels off in sections that you sew together. If you are sewing 60" inch panels together, you will need 3 panels to get a strip 5 yards long. If you have 45" fabric, it will take 4 panels.
If your fabric is one color or has a sideways design, you can simply cut off a 5 yard length of fabric. To look truly authentic, pinch the fabric and sew some seams in so it looks like you cut and sewed together panels, as they would have done in the 1860s.
Marking it
Once you have your 5 yard length, use a pin or washable marking tool to mark the exact center.
Then mark the centers of the two halves. Your marks should be in these spots:

You now have four sections marked off on your fabric. Each of those four sections will need to be pleated to the number we figured up earlier - in my case, 7.5".
Starting pleating in the center
Use a hard, flat ruler for this.
I know from experience that 28"-32" waists generally need 1"-deep pleats. So I plop the 1" mark on ruler on the center mark of the fabric and slide the fabric snugly over it to start my first pleat.

You may need to experiment a little to find the right depth of pleat for your skirt. Don't be afraid to re-pin the pleats if it doesn't look right the first time. I often re-pin if the amount of fabric isn't working out quite right.
Now I like to do a double pleat at the center and at the back of the skirt. I think it provides a little more fullness and makes the skirt lay nicer. This is optional. But if you want to do it, fold another 1" pleat over top of your first pleat and pin it down.

I usually go ahead and do both sides of the center. So put a pleat (or double pleat) on the other side of your center mark, with the pleat turned into the center (facing your first pleat).

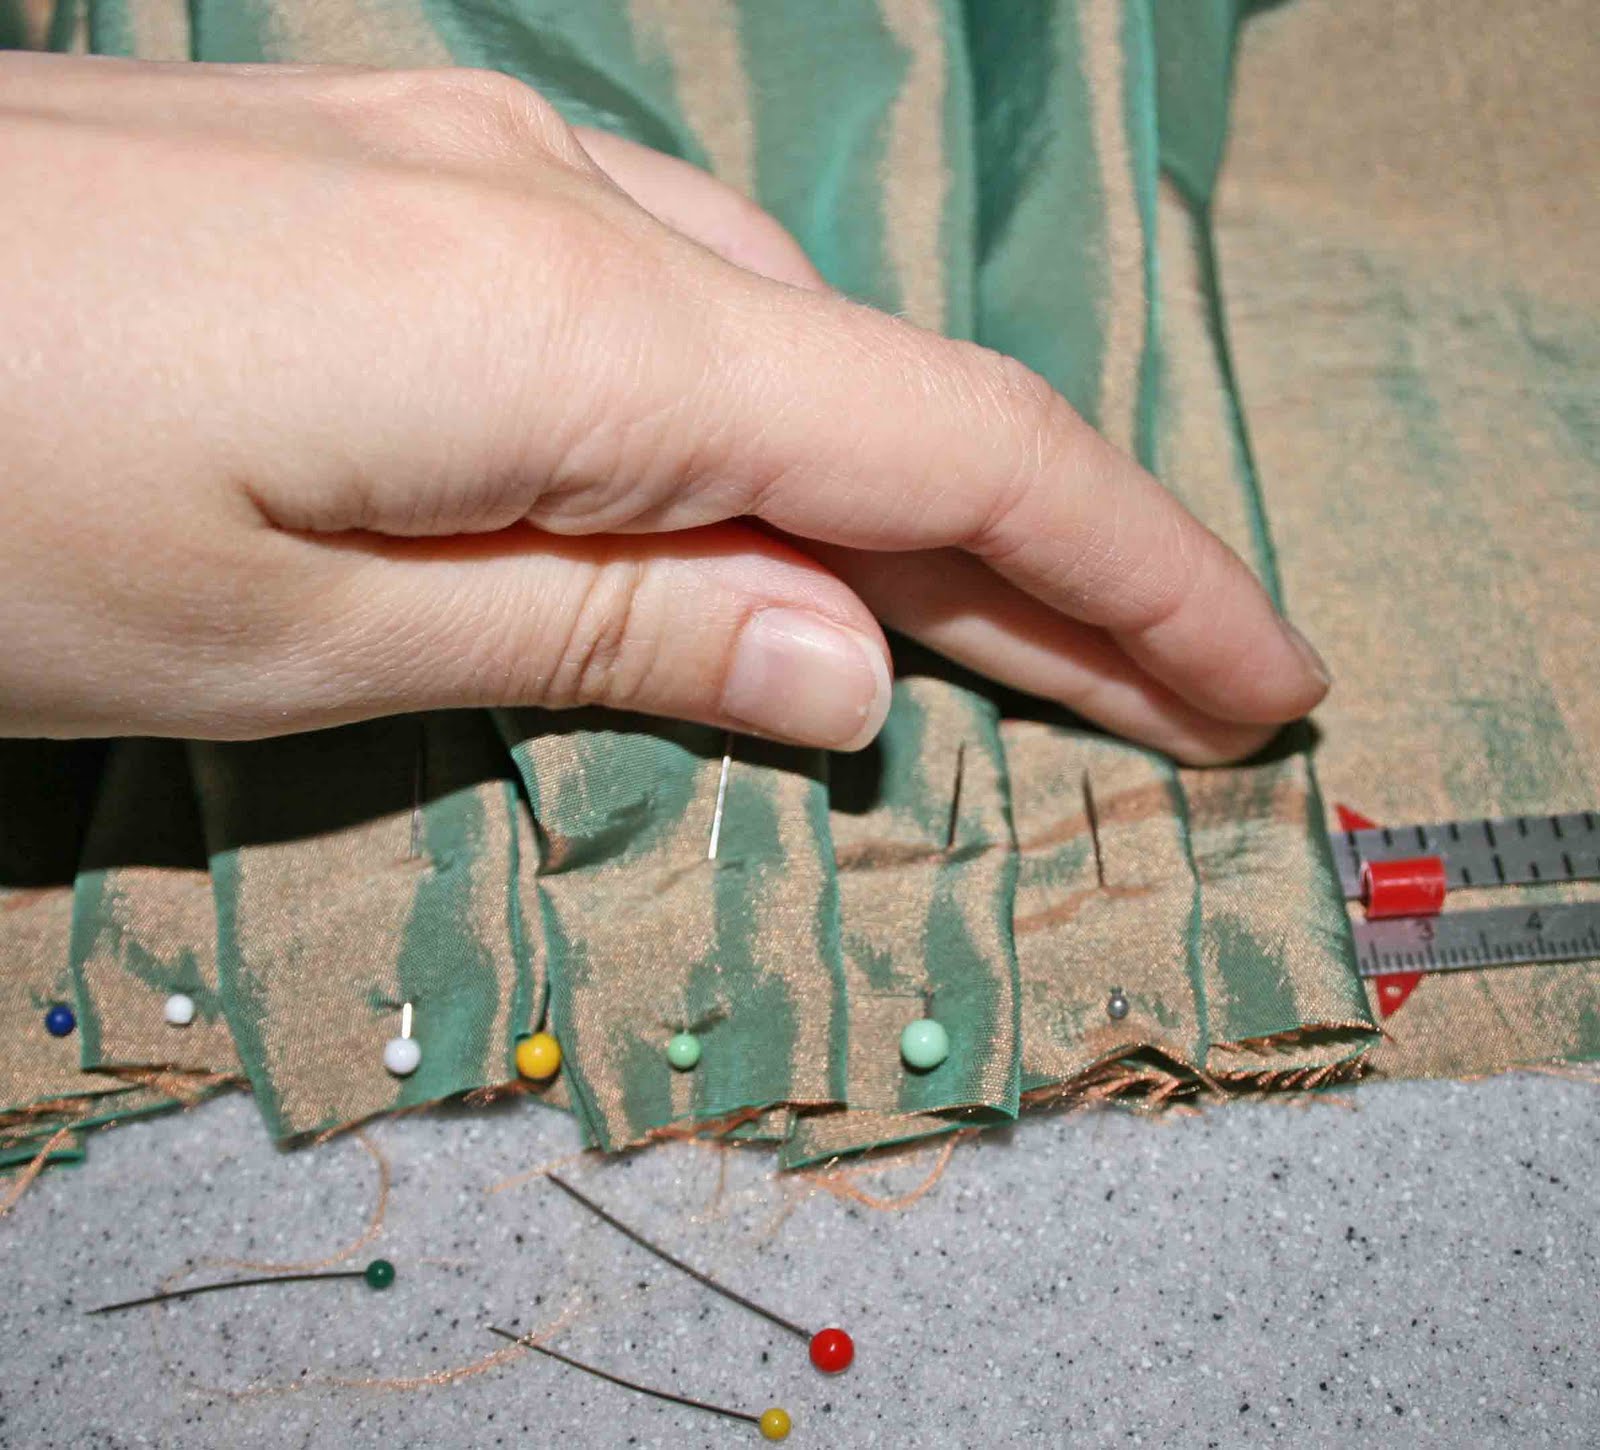
Now you can begin to pleat your first section. I like the part of the pleat that shows to be about 1/2". So I set my ruler to 1.5" with 1" of the pleat being hidden.

Continue to pleat the rest of your first section. You may come to a seam - make sure the seam is on the inside of a pleat, not on top. You may need to make this pleat a little deeper or shallower to accomodate hiding the seam.

Box Pleat
When you come to the end of your first section (which will be where the side center mark is), you will need to make a box pleat. This is a pleat that goes both directions. Note that my box pleat is a double pleat - this is optional.

Now that you've finished your first section, make sure it is the length we figured up earlier. As you can see, mine is roughly 7.5" like I wanted.

The Second Section
Go ahead and make a box pleat again to start the next section (I made a double pleat as usual). Now we will be pleating in the other direction.

When pleating this direction, it is easiest to set your ruler to the depth you want for the hidden part of the pleat. I set my ruler back to 1".

Continue pleating in this direction.
When you come to the end of the fabric, you can do an optional double pleat. Leave a few inches of fabric free at the end. This pleated section should also equal the number we figured up earlier - in my case, 7.5".

The Final Two Sections
Now you have successfully pleated half your skirt!
The second half should be a mirror image of the first half. Check the number of pleats in each section so that you keep it even on both sides.
The only difference on this half is that when you get to the end, you should fold the remaining fabric under in the final pleat.

Here is a picture of the final product. The arrows show where our original three markings were on the skirt.

If you need a diagram for your pleats, here it is. The X's are the three places we marked at the beginning.

Here are a couple photos of the skirt with the waistband on it. Notice how the small pleats help the skirt lay evenly all over the hoop? And note the extra fullness in the front where some of the double pleats are.


As a final note, when you actually sew the pleats down, they may "wiggle" in spite of having a pin in every pleat. So be sure you don't stretch your fabric or allow the pleats to "grow" as you sew or you'll wind up with an inexplicably larger waistband than you intended!
Happy pleating!
No comments:
Post a Comment